Using Offline Installer to Install Office 365 and Office 2016 Pro plus ms.codes

Offline Office installation has many advantages over online installation. It removes the complication of logging in with a Microsoft account and validating your product key in advance prior to downloading Office in case of Office 2016 installation. It is also perfect for installing Office on multiple PCs as you can simply copy the installer on a USB flash drive and use it to install Office on different PCs without having to download Office repeatedly. It is ideal as well if you are having trouble downloading Office since you can opt to purchase the USB installer to easily install Office offline.
IMPORTANT
If you own previous releases of Microsoft Office below the 2016 version, it is of utmost importance that you remove them first before installing Office 2016 to prevent application errors. Microsoft Office is designed in a way that it only allows one installation and once license to exist in a single device. Pirated Office should also be thoroughly removed to ensure that the new installation can connect to Microsoft’s activation servers for activation.
For PC, remove all licenses first: To remove existing Office license using the official Office license removal tool, click here. Run the program and follow on-screen instructions.
For PC, remove all installations next: To remove existing Office installation using the official Office removal tool, click here. Run the program and follow on-screen instructions.
For Mac, remove all installations first: Click here for a guide on how to remove Office from Mac.
After removing office licenses and uninstalling office, it is important to restart your computer.
INSTALLING OFFICE 365 AND 2016 ON THE PC
1. To download both Office 365 and Office Professional Plus 2016 offline installers for PC, click here. This is an official download link. Note that Office 365 and Office Professional Plus 2016 both uses Office Professional Plus 2016 hence, they have the same installer. File size is 4.3 GB and it will take about a few minutes to a few hours to download Office depending on the speed of your internet connection. Office 365 will upgrade to Office 2019 after installation as it will always use the latest version of Office.
2. Once download has finished, locate the file and mount the disc image file. If mount option is not available, simply double click the disc image file.

3. This will open the main file directory. Open the only folder in this directory named Office and right click on either Setup32 for the 32-bit version or Setup64 for the 64-bit version. Click Run as administrator and then click Yes on the next prompt to allow Office to make changes on your device.

4. Office will now begin to install. It will only take about 5 to 10 minutes and internet connection is not required.

5. Once Office is installed, click close.

6. Run any Office application such as Word. You will then be asked to enter a product key.

7. Internet connection is required to activate Office. Depending on the product you purchased, activation varies:
7A. If you purchased Office Professional Plus 2016, you will receive a 25 digit product key. Enter this key and click Activate Office.

7B. If you purchased Office 365, you will receive a username and password. Do not enter a product key and click Back instead. You will then be prompted to Sign in. Click Sign in and enter your Office 365 username and password to activate Office. If you still haven’t changed the default password, you will be required to set a new password for the account. Write down your password and store it safely as there is no way to recover your password once forgotten.

8. After activating office, You will be prompted to accept Microsoft Office License Agreement. Accept the terms.

9. Congratulations, your Office 365 or Office Professional Plus 2016 are now activated for life!

II. INSTALLING OFFICE 365 FOR MAC
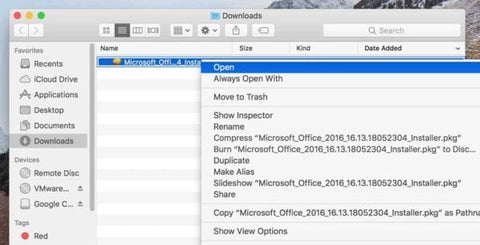
1. Download Office 365 offline installer for Mac by clicking here. This is an official download link. Do note that only Office 365 Professional Plus is compatible with Mac. Once download has finished, locate and open the file.
2. Click Continue then Continue again and select Agree on the terms of software license agreement prompt.

3. Click Install to install Office using standard installation settings. You can also select the apps you want to install by selecting Customize. If you prefer to change the default installation
location, simply click Change Install Location….

4. Enter your Mac OS password and click Install Software to begin installation.

5. Installation will take anywhere from 5 to 15 minutes depending on the speed of your computer. Internet connection is not required. Once done, click Close.

6. Open any Office app such as Word to start activating Office 365 for Mac. A Sign In to Activate Office prompt will appear. Simply click Sign In.

7. Enter the credentials we gave you which include the username and password. In case you already changed the password thru your online dashboard, always use the password you set for the account. Click Sign in.

8. Congratulations! Your Office 365 Professional Plus Lifetime for Mac is now installed and activated.


