How To Remove A CPU Cooler

Have you ever wondered how to remove a CPU cooler without causing damage to your computer? Well, I'm here to help you with that. Removing a CPU cooler may seem like a daunting task, but with the right tools and techniques, it can be a straightforward process. So, let's dive in and discover the best way to safely remove a CPU cooler.
When it comes to removing a CPU cooler, it's essential to understand the importance of proper technique and preparation. Before you begin, make sure to shut down your computer and unplug it from the power source. This will ensure your safety and prevent any potential damage to the components. Additionally, having a clean and organized workspace will make the process much smoother. Now, let's discuss the steps involved in removing a CPU cooler.
To remove a CPU cooler, follow these steps:
- Shutdown and unplug your computer.
- Remove the side panel of the computer case.
- Locate the CPU cooler and identify the mounting mechanism (screws, clips, or brackets).
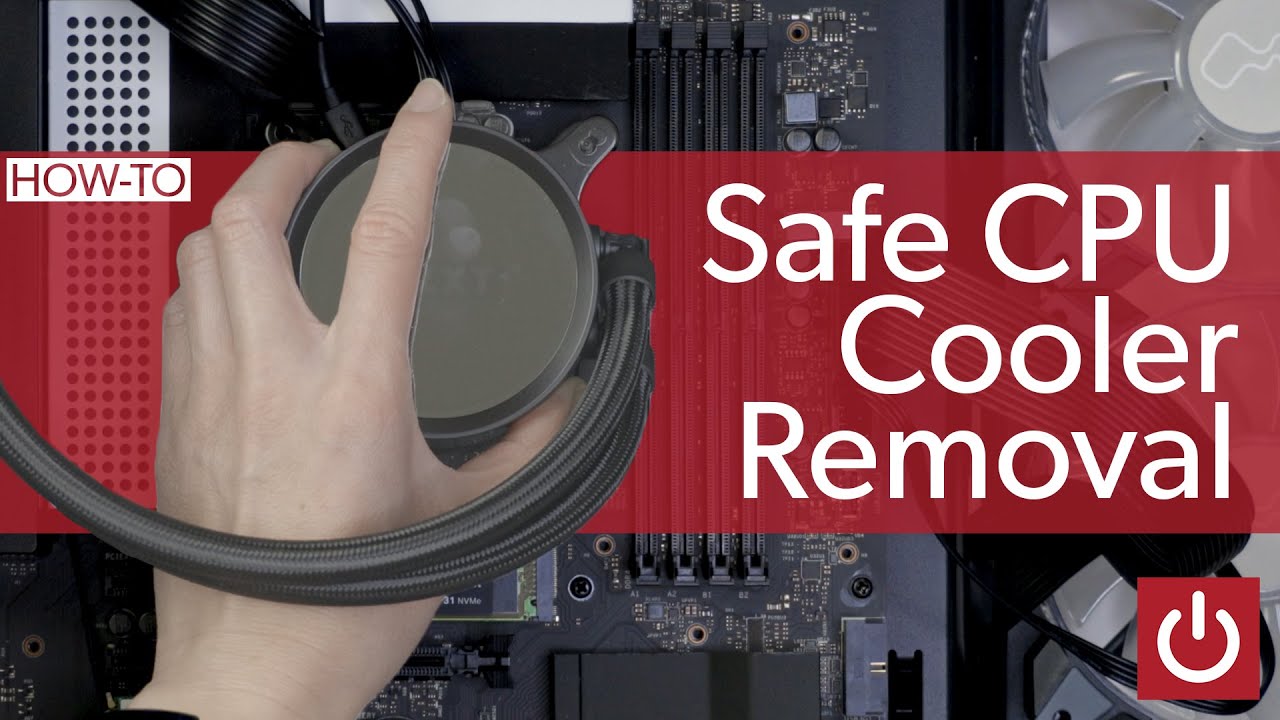
- Unplug the fan power cable from the motherboard.
- Unscrew or unclip the CPU cooler from the mounting mechanism.
- Gently lift the CPU cooler off the CPU, taking care not to damage any components.
- Thoroughly clean the CPU and the cooler using isopropyl alcohol and a lint-free cloth.
By following these steps, you can safely remove a CPU cooler without causing any damage to your hardware.

Understanding the Importance of Proper CPU Cooler Removal
When it comes to maintaining and upgrading your computer system, knowing how to remove a CPU cooler is an essential skill. Whether you're replacing a faulty cooler, upgrading to a more efficient one, or simply need to access other components in your system, removing the CPU cooler correctly is crucial to avoid any damage to the processor or surrounding components.
Removing a CPU cooler involves delicacy and precision, as well as understanding the hardware involved. This article will guide you through the step-by-step process of removing a CPU cooler. By following this guide, you'll ensure a smooth and safe removal, allowing you to perform necessary maintenance or upgrades without any complications.
Before we dive into the specifics of removing a CPU cooler, it's important to note that this process requires a moderate level of technical expertise. If you're uncomfortable working with computer hardware or if you're unsure of your capabilities, it's always recommended to seek professional assistance to avoid any accidental damage to your system. Now, let's get started with the removal process!
Step 1: Preparing for CPU Cooler Removal
Before you begin the actual removal process, it's crucial to ensure that you have a clean and organized workspace. This will help prevent any accidental damage or misplacement of components.
Here are some preparatory steps to follow:
- Power off your computer completely and unplug the power cable.
- Place your computer on a stable surface with plenty of space to work.
- Ground yourself by touching a grounded object to discharge any static electricity.
- Gather the necessary tools for the removal process, such as a screwdriver, thermal paste remover (if applicable), and cleaning materials.
By taking these precautionary measures, you'll create an optimal working environment and minimize the risk of any accidental damage to your components.
Step 2: Disconnecting the Power Supply
Before removing the CPU cooler, it's imperative to disconnect the power supply to ensure your safety and prevent any potential damage.
Here's how you can do it:
- Switch off your computer and unplug it from the power source.
- In a desktop computer, locate the power supply unit (PSU) and disconnect its power cable from the wall outlet or surge protector.
- If you're working with a laptop, ensure that it's powered off and disconnect the charging cable.
These steps will eliminate any electrical charge running through your computer system, making it safe to continue with the CPU cooler removal process.
Step 3: Identifying the CPU Cooler Assembly
Before you can remove the CPU cooler, it's essential to identify the specific assembly type you have in your system. Different types of coolers have varying methods of attachment, and understanding the design will help you navigate the removal process with confidence.
Generally, there are two common types of CPU coolers:
- Air coolers: These feature a heatsink, a fan, and typically use a clip or mounting bracket system to attach to the motherboard.
- Liquid coolers: These involve a radiator, a pump, tubes, and a CPU block. They often use screws or mounting brackets for attachment.
Consult your CPU cooler's manual or the manufacturer's website to identify the specific model and installation method. This information will be helpful during the removal process.
Step 4: Detaching the CPU Cooler
Now that you're familiar with your CPU cooler assembly, it's time to detach it from the motherboard. This step requires careful attention to avoid any damage to the processor or other components.
Follow the instructions below to successfully remove the cooler:
- For air coolers:
- First, unplug the fan power cable from the motherboard or fan header.
- Next, gently unclip or unscrew the mounting mechanism securing the cooler to the motherboard. The number and location of clips or screws may vary depending on the cooler model.
- Once all connections and attachments are detached, carefully lift the cooler off the CPU. Be careful not to pull or damage the CPU in the process.
- For liquid coolers:
- Begin by ensuring that all fan cables, pump cables, and tube connections are disconnected from the motherboard.
- Next, locate the screws or mounting brackets holding the radiator, pump, and CPU block in place. Using a screwdriver or the appropriate tool, carefully unscrew and release these attachments.
- Once all the attachments are removed, gently lift and separate the cooling system from the CPU. Take care not to spill any liquid or damage the components.
Always refer to your CPU cooler's manual or the manufacturer's instructions to ensure a proper detachment process, as different models may have specific steps or considerations.
Step 5: Post-Removal Considerations
Once you've successfully removed the CPU cooler, it's important to address a few post-removal considerations before proceeding with any further maintenance or upgrades.
Retain the following tips in mind:
- Clean the CPU and cooler: Use appropriate cleaning materials to remove any thermal paste residue from the CPU surface and the cooler's base. This will ensure optimal thermal conductivity when reapplying the cooler.
- Inspect for damage: Take a moment to inspect the CPU, cooler, and surrounding components for any signs of damage or wear. Look for bent pins, cracks, or any other abnormalities that might affect performance or compatibility.
- Prepare for reinstallation: If you plan to reinstall the same CPU cooler or replace it with a new one, gather the necessary components and thermal paste before proceeding.
By following these post-removal considerations, you'll have a solid foundation for any further maintenance or upgrade tasks you decide to perform.
Conclusion
Properly removing a CPU cooler is an important skill for any computer enthusiast or professional. By following the step-by-step process outlined in this article, you can safely and effectively remove a CPU cooler, allowing you to perform necessary maintenance or upgrades to your computer system with confidence. Remember to always consult your CPU cooler's manual or manufacturer's instructions for any specific considerations or steps.
Removing a CPU Cooler
Removing a CPU cooler may be necessary for various reasons, such as upgrading or troubleshooting. Here are the steps to safely remove a CPU cooler:
- Step 1: Shut Down and Unplug Your Computer - Ensure that your computer is powered off and disconnected from any power source before proceeding.
- Step 2: Remove the Side Panel - Open up your computer case by removing the side panel. Consult your computer's manual for specific instructions on how to do this.
- Step 3: Disconnect the Fan Cable - Locate the CPU cooler fan and disconnect the cable connecting it to the motherboard. Be gentle and ensure that you unplug the cable properly.
- Step 4: Remove the Mounting Clips or Brackets - Most CPU coolers are secured to the motherboard using mounting clips or brackets. Remove these carefully, following the instructions provided by the manufacturer.
- Step 5: Carefully Lift the CPU Cooler - With the mounting clips or brackets removed, carefully lift the CPU cooler off the top of the processor. Do this slowly and smoothly to avoid any damage to the CPU or other components.
By following these steps and exercising caution, you can safely remove a CPU cooler from your computer. Remember to consult your computer's manual and any manufacturer instructions for specific guidance.
Key Takeaways - How to Remove a CPU Cooler
- Ensure that you have the necessary tools before starting the removal process.
- Make sure to turn off your computer and disconnect it from the power source.
- Carefully remove any cables or connectors attached to the CPU cooler.
- Use a screwdriver to remove the screws holding the CPU cooler in place.
- Gently lift the CPU cooler off the CPU, making sure not to damage any components.
Frequently Asked Questions
In this section, we will address some common questions regarding the process of removing a CPU cooler. Whether you need to upgrade your cooler, replace a faulty unit, or clean your components, these answers will guide you through the necessary steps.
1. Can I remove a CPU cooler without damaging my processor?
Yes, you can remove a CPU cooler without damaging your processor, as long as you follow the proper procedure. The key is to disconnect the cooler from the motherboard carefully and avoid pulling or applying excessive force to the CPU. Make sure to gently twist the cooler to break the bond between the thermal paste and the processor before lifting it away. If you encounter any resistance, stop and re-evaluate your technique to prevent any harm to your CPU.
Additionally, it's essential to handle the CPU cooler with care, as it may have sharp edges or delicate components. By taking your time and being cautious during the removal process, you can safely uninstall your CPU cooler without causing any damage to your processor.
2. What tools do I need to remove a CPU cooler?
To remove a CPU cooler, you will need a few basic tools:
- Phillips-head screwdriver
- Isopropyl alcohol (to clean thermal paste)
- Lint-free cloth or coffee filter (for cleaning)
- Anti-static wrist strap (optional, but recommended)
These tools will assist you in safely detaching the CPU cooler from your processor and motherboard, as well as preparing the surface for the installation of a new cooler, if necessary.
3. Is it necessary to remove the CPU from the socket to remove the cooler?
No, it is not necessary to remove the CPU from the socket in order to remove the cooler. You can detach the cooler directly from the motherboard while the CPU remains in place. However, it's crucial to ensure that the CPU is securely fastened in the socket and that you take adequate precautions to prevent any accidental damage during the removal process.
If you need to remove the CPU for any reason, such as upgrading or replacing it, you should follow the manufacturer's instructions and handle the CPU with extreme care to avoid bending any pins or causing static damage to the delicate components.
4. How do I clean the thermal paste after removing the CPU cooler?
To clean the thermal paste after removing the CPU cooler, follow these steps:
- Use isopropyl alcohol (preferably 90% or higher concentration) to dampen a lint-free cloth or a coffee filter. Do not use cotton balls or tissues as they can leave fibers behind.
- Gently wipe away the old thermal paste from the CPU and the cooler base, being careful not to bend any pins or damage any components.
- Repeat the process until all traces of the old thermal paste are removed.
- Allow the cleaned surfaces to air dry completely before applying new thermal paste for future use.
Remember to exercise caution and take your time during the cleaning process to avoid any accidental damage to the CPU or cooler.
5. Are there any additional precautions I should take when removing a CPU cooler?
Yes, there are a few additional precautions you should take when removing a CPU cooler:
- Before starting, ensure that your computer is turned off and unplugged from the power source to prevent any electrical accidents.
- Wear an anti-static wrist strap or regularly touch a grounded metal object to discharge any static electricity and prevent ESD (electrostatic discharge) damage to your components.
- Refer to the manufacturer's guidelines or documentation for your specific cooler model to ensure you follow the correct procedure for safe removal.
- If you encounter any resistance or difficulty during removal, stop and assess the situation. Applying excessive force or using improper techniques can lead to damage.
- After removing the cooler, clean the components, especially the CPU and cooler base, as buildup or debris can affect cooling performance.
By following these precautions, you can minimize the risk of any damage or accidents while removing your CPU cooler and ensure a smooth removal process.
Removing a CPU cooler may seem like a daunting task, but with the right steps, it can be done smoothly. Firstly, make sure to turn off your computer and unplug it from the power source to ensure safety. Next, locate the screws or clips that secure the cooler to the CPU. Gently unscrew or unclip them, being careful not to damage any surrounding components. Once the cooler is loose, lift it off the CPU slowly and evenly, making sure not to put too much force. If there is any resistance, double-check that all screws or clips have been removed. Finally, clean the CPU surface and reapply thermal paste before installing a new cooler.
Remember, removing a CPU cooler requires patience and attention to avoid any damage. Taking necessary safety precautions and following the steps carefully will ensure a successful and hassle-free removal process. If you feel unsure about any step, it's always a good idea to consult the manufacturer's manual or seek professional help. So go ahead, confidently remove your CPU cooler and take the necessary steps to keep your computer running smoothly!


